Cook Over a Campfire
Cooking over a campfire, or over open flame is a dying art to be sure. And let's face it, its not really considered a necessary skill to know anymore since electric and gas stoves are ubiquitous. Unless you are into prepping...!
But there are reasons to know how to cook over open flames and to have the right equipment to do so. Extended power outages come to mind.
I remember as a kid a hurricane hit our area and left us without power for 2 weeks. We had an electric stove which was no longer operational, so mom had to cook in the fireplace. We ate a lot of grilled cheese sandwiches those 2 weeks. At least we had that...
But things are different today, and it's pretty easy to incorporate cook wear into your daily routine that can work over the stove, as well as over the fire.
Let's look at some of the techniques you need to learn, and some of the products that will facilitate them so you can learn how to cook over a campfire like a pro!
Practice Makes Perfect
Before we get stared though it is important to point out that cooking over a campfire can be a different experience than using the stove at home. While the techniques below can help, you should practice them ahead of time, when the pressure is off.
So instead of lugging a propane grill along with you when camping, try cooking over the fire-pit instead (or bring the grill as plan B at first.)
If you have a yard, dig a hole. Viola, you have a fire pit. If you can line it with rocks, great. If not no problem, just make sure you clear the area around of flammable materials.
There are a bunch of primitive types of fire pits you can make, like a Dakota fire pit, do your own research on that. What we are going to focus on here is not the type of pit itself, but the way to cook over what most folks in the US would have, either a hole in the ground or a ring with rocks.

Get One of These
I've started hundreds of campfires and cook fires over the years. Besides matches and wood, there is one thing for me that is a must have, and that is a Pocket Bellows.
A say what? Pocket Bellows?

It's a 19" long skinny metal tube that collapses into a 4" long tube. You blow in one side of it and point the other side toward you fire.
Like the bellows of a blacksmiths forge, the air you blow into the fire will increase the temperature and burn rate. This is immensely helpful for getting fires to get started or when you are adding new wood and want it to catch quickly.

The original Epiphany Outdoor Bellows will run you around $12 or you can get knock-offs on Amazon for 1/5 the price.
Trust me, get one of these. It will give your fire building skills a +10 level up.
Best Practice
So you are ready to make a campfire to cook over?
Firstly make sure you have everything prepared ahead of time, vegetables washed and cut, items that need to be wrapped in foil are ready to go, etc. That way you can focus on cooking when the time has come, and avoid burning your food because you were distracted.
Once you are ready to make the fire don't pile all your wood on at once and build a big fire, you'll be left with too-hot coals and no direct flame.
Start with a smaller fire using kindling and small logs. Let burn for 30 minutes then add larger pieces as needed. This gives you a good base of coals and direct heat when you need it.
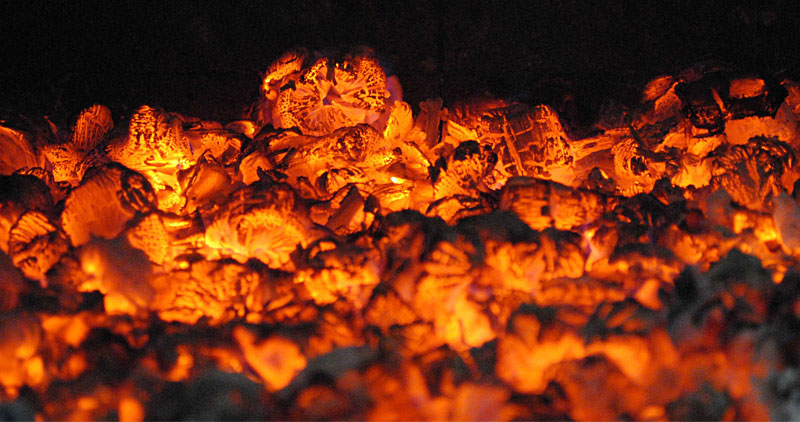
Big bright fires are fun for partying, but not for cooking! This photo below is what you want.

If you have the room build your fire off to one side of the grill, and move the coals over to where you want to cook. This gives you more control over where the heat is focused.
Over the Fire
Many of the tools you use in your kitchen at home won't hold up to the heat of a campfire. Good news if you have a BBQ then you probably have most if not all of what you'll need.
We'll talk about the types wood you can/can't use in the Common Mistakes section below, but it's the first thing you'll need if you want a fire, eh?
OK so what else? Well you need something to cook over first. You have a few options:
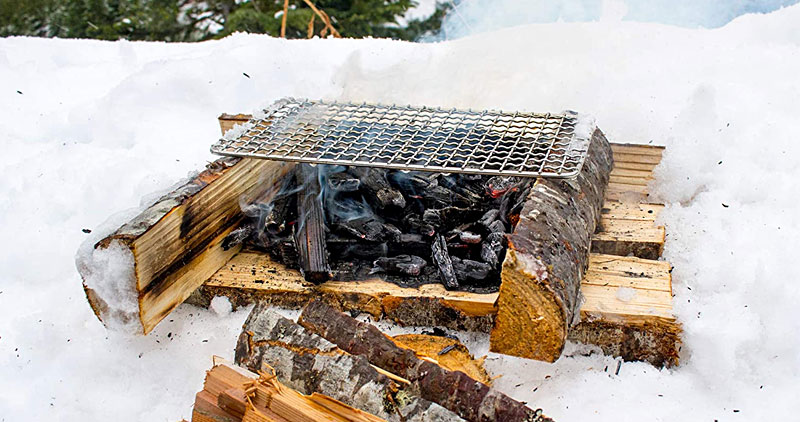
Stainless Steel Grate
If you want to grill items directly over coals the best way to do it is to have a stainless steel grate. There several great options out there and Amazon has a good selection of them.

Expedition Research, Redcamp, and DZRZVD make the ones we like the best. We use the Redcamp Folding Grate when home and camping as it has folding legs which gives us more options when using it. It is 13.6"x 9" x 6.5" so plenty of room for a small family cookout.
Campfire Grills
If you have to feed larger groups and want to use cast iron pots and pans, then you can use a Campfire Grill.
Camp Chef makes a model that we like called the Lumberjack Over Fire Grill. They have 2 sizes: 18"x36" and 16" x 24".
It is treated with a high temperature black paint. According to them you can cook directly on it if you want, or (if you are like me and aren't 100% a fan of that idea) stick to stainless steel when cooking meats and veggies.

There are another couple of designs that are worth looking at, and are useful, although perhaps slightly less portable.
One is the stake style, and the other is the old-school cowboy tripod.
Stake Style Grills
The stake style systems are great, because you can do a bunch of different things with them. They do require a little bit of prep-work though, as you will need to hammer one end into the ground (then pull it out again.)
The Camp Chef folks call it their Mountain Man Grill. Manly enough for you?

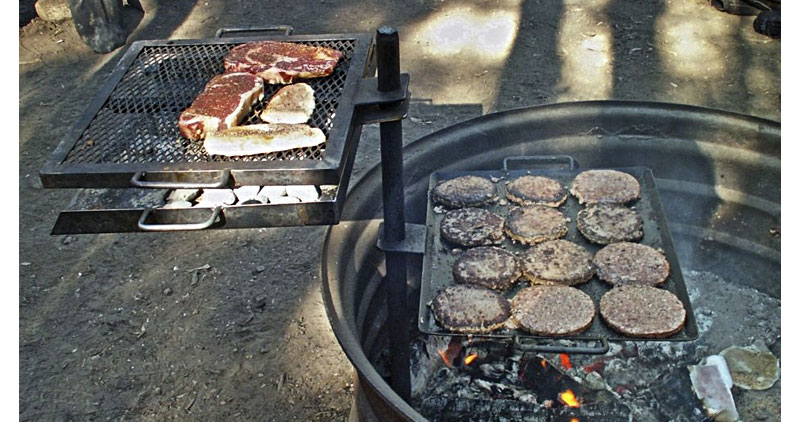
You can use it over an established campfire or cook directly on it with coals. Or both, as the photo above shows.
Amazon has a couple of different styles of this type of grill that cost less than the Mountain Man, although we think the Camp Chef one is the better built options.
Tripod Grills
The tripod style of campfire grills is good to use on rocky ground and allows you to cook directly over the fire.

What's great is that these are cheap and easy to setup. They also break down into a relatively small form factor when unused.
Going back to Camp Chef again, their Lumberjack Tripod Grill costs $31.
Common Mistakes
There are a number of things you should know before jumping into cooking with wood if you haven't done so before.
Get the Good Wood
Not all firewood is created equal, some a better than others, some types you need to avoid all together.
Oak, Hickory, Cherry & Pecan woods are the most preferred for cooking.
If you have access to other types of fruit woods, like apple, almond or cherry they are wonderful for grilled foods. The smoke aroma compliments the food very nicely.
Oak is very dense, and burns hot and long. It is also a great choice for grilling. It does have a strong smokey flavor.
Hickory and Mesquite are fantastic too.
So where do you get it? Believe it or not, Amazon has a wide variety of cooking woods available. Many of which have Prime shipping!

Also do an internet search for "cooking wood" and add your location, i.e: "cooking wood Macon GA" and see if there are any local companies who will deliver wood to your home.
We also found this company: Cutting Edge Firewood, that seems to have reasonable prices and ships kiln dried wood throughout the US.
Avoid These
Try to avoid pine and juniper woods. They are resinous, which can impart undesirable flavors on foods, and in some cases can even be toxic. They burn quick and cool too, 2 non-desirable characteristics in cooking woods.
Also avoid driftwood for the same reasons.
I would also avoid using processed woods, like pallets or architectural woods like 2x4's, they can be treated with harmful chemicals.
Hemlock doesn't burn well, if at all. Aspen, basswood and willow trees all have very soft wood of generally poor quality for burning and producing heat.
Don't Cook Over the Flame
If you have thin cuts of meat that you want to cook medium or rare go ahead, cook over he flame. Or if you want to finish off a steak with some sear, cool.
But don't just lay everything else on top of a raging fire please, unless you like to eat burned food. Picard will disapprove.

Build the fire on one side, let it burn down (usually about 30-45 minutes) the spread the coals over to where you want to cook. Then place your grill on top of them to cook. The hot coals can be used to cook vegetables in aluminum foil or for baking in your Dutch oven camp stove.
Don't Overcook
Something many people don't know, meat continues to cook for a short time even after removed from the heat. So with items like steaks, it is really easy to overcook them without realizing it.
For larger items we can be talking about 20 minutes with a 5 to 10-degree temperature difference!
So you want to remove your food from the grill just before you think you should and let it rest for a while to let the juices get where they need to. Cover with a bit of foil if you want to keep the heat in.
The best thing to have is a meat thermometer. Amazon has several which work great and are not expensive. I'm not sure you need to include one in your emergency kit per se, but if you are just getting started in grilling or cooking over a campfire its a great tool to help you learn.
Campfire Cookware
There are ways to cook over a fire using sticks to hold food, banana leaves, bamboo, rocks; the list goes on and on. And it's worth looking into some of those ideas, not just for fun, but for backup if you need to know older traditional ways of cooking.
Those ideas are beyond the scope of this article, we are assuming here that you have access to the modern conveniences like pots and pans.
Modern might be a relative term, as the items you'll want to use to cook over a fire are the ones our great-grandparents (and earlier) used.
I'm talking specifically about cast iron pans and dutch ovens.

Cast iron, it's uses, care, and history is a subject on to itself. We will look at a few key points and let you do the rest of the homework on it.
Here's some help though: Cast Iron 101 and How To Clean & Season Cast Iron.
There are a multitude of pan styles, sizes, and types, and what you will need really depends on the type of food you are cooking and the amount of people you are cooking for.
For our small family, we use the following everyday, a 12" and an 8" cast iron pan.

There are many manufacturers out there that make them. Some better than others. Coming back to Camp Chef again, they make a pre-seasoned 8" cast iron skillet for $12 and a 12" cast iron skillet for $21.
Yes, Lodge makes decent cast iron for a little bit less, but I've found that their surfaces are too rough for my liking.
Here's a secret if you promise you wont tell anyone: The best cast iron is the stuff that was made back in the 1920's and 30's. Our favorite from that time is from Griswold.
Whats so great about it? Super light with very smooth cooking surfaces that were fully machined. They are nearly non-stick. There's just no comparison between the old stuff and the new. We get ours from eBay. It isn't cheap, but you only need one, they will last you and your family another 100 years...probably more...


